
Why TOC Styling is the Map to Your Thesis
In college and institute paper formatting, the Table of Contents (TOC) is often the first page an examiner reads. A messy TOC with misaligned numbers or inconsistent fonts creates a bad first impression.
Standard academic rules often require a strict visual hierarchy:
- Level 1 (Chapters): Bold and Uppercase (e.g., CHAPTER 1: INTRODUCTION).
- Level 2 (Sections): Indented slightly (e.g., 1.1 Background).
- Level 3 (Sub-sections): Indented further (e.g., 1.1.1 Overview).
PaperFormat.net allows you to map these styles globally. You define the look for "Level 1" once, and the system automatically applies it to every Chapter title in your index.
Step-by-Step: Customizing Your TOC and Lists
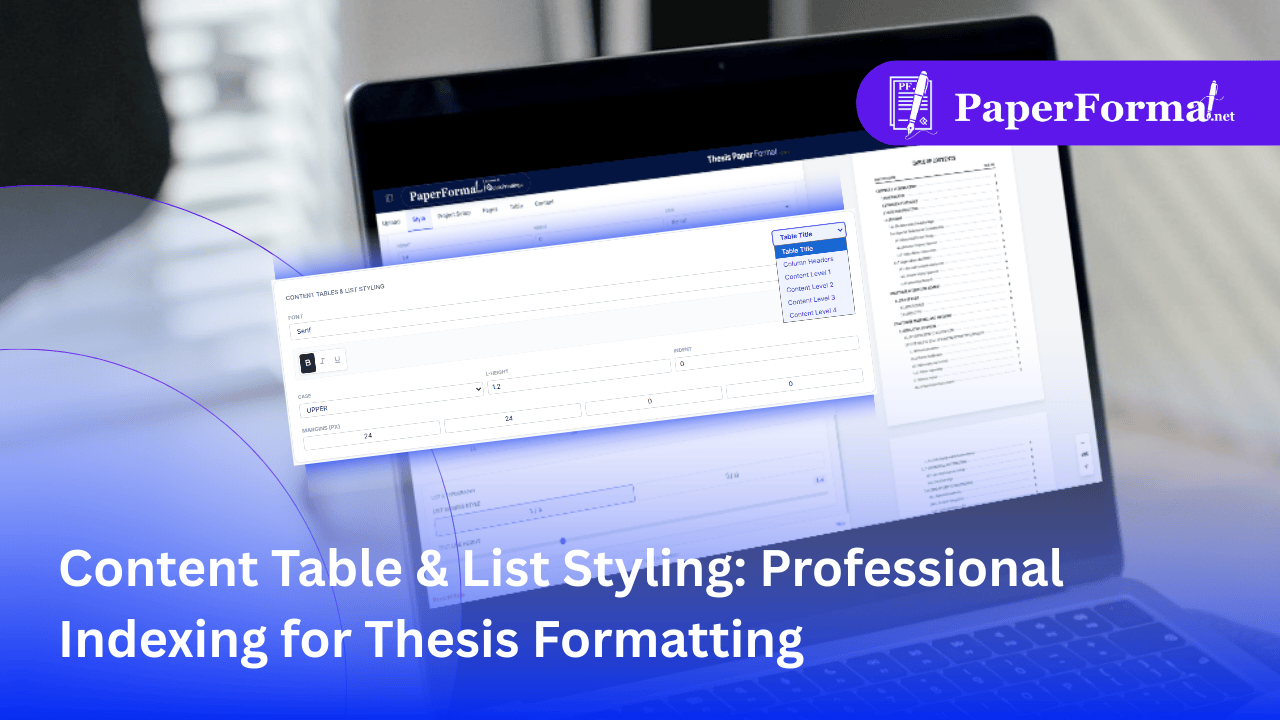
Refer to the screenshot above and follow these steps to build a navigation-friendly index.
Step 1: Access the Content Table Settings
- Navigate to the "Style" tab in the top navigation bar.
- Scroll down to the section titled "CONTENT TABLES & LIST STYLING".
Step 2: Select the Hierarchy Level
- This is the most powerful feature. Click the dropdown menu on the right. As shown by the red arrows in the image, these levels correspond directly to your TOC structure:
- Table Title: Styles the main header "TABLE OF CONTENTS".
- Column Headers: Styles the labels like "Content Name" and "Page No.".
- Content Level 1: Controls your main Chapters (e.g., CHAPTER 1).
- Content Level 2: Controls your sub-sections (e.g., 1.1).
- Content Level 3 & 4: Controls deeper sub-sections (e.g., 1.1.1).
Step 3: Define Typography & Case
- Case Control: Institute rules often require Chapter titles in the TOC to be capitalized. Instead of re-typing, select "Content Level 1" and set "CASE" to "UPPER" (as seen in the image). The system will capitalize them automatically.
- Font & Emphasis: Use the B (Bold) icon for Level 1 to make chapters stand out, while keeping Level 2 and 3 normal weight.
Step 4: Master Indentation
- A flat list is hard to read. You need visual steps.
- Select "Content Level 2" from the dropdown.
- Change the "INDENT" value (e.g., 20 px).
- Repeat for "Content Level 3" with a larger indent (e.g., 40 px).
- This creates the classic "stairstep" look required for professional thesis formatting.
Step 5: Adjust Spacing (Margins)
- Does your TOC look cramped? Use the "MARGINS (PX)" settings.
- Increasing the Top/Bottom margin adds breathing room between list items, making your project report easier to scan.
Why This Beats Manual TOC Creation
- Live Mapping: As the red arrows in the image show, changes happen instantly. You can tweak the font size and see it update on the document preview immediately.
- Global Consistency: You ensure that every Level 2 heading has the exact same indentation, rather than tapping the "Tab" key randomly in Word.
- Institute Compliance: Whether your college wants "Dotted Leaders" or specific font weights, you can configure it here to match their sample perfectly.